


CRU unlocks the full potential of your display, enabling custom resolutions, higher refresh rates, and precise tuning for an unparalleled visual experience. It's the go-to tool for enhancing gaming and professional visuals, compatible with most GPUs, all in a user-friendly, no-install package.
What is Custom Resolution Utility (CRU)?
Custom Resolution Utility is a versatile tool that empowers you to tailor your display settings for an optimized visual experience. Indeed, its primary purpose is to let you tweak resolution and refresh rates beyond default settings.
With CRU, you can also fine-tune display timings for precision and explore monitor overclocking for smoother visuals. Its user-friendly interface makes it accessible for novices and experts, while its compatibility with various GPUs ensures broad applicability. CRU stands out as a no-install, portable solution for achieving the perfect display setup, making it a favorite among enthusiasts seeking to push their displays beyond conventional limits.
What are the key features of Custom Resolution Utility (CRU)?
- Custom resolutions and refresh rates: Adding new resolutions and refresh rates not supported by default are the main features of CRU. That's useful to enhance your gaming and video playback experience. Still, remember that CRU can only scale down to lower resolution, as higher resolutions only work if your monitor can handle them.
- Interface: The interface is just what you need for this kind of software, combining simplicity, technical settings, and intuitiveness.
- Recovery options: You can experiment as you please with various configurations, as it lets you reset settings to default and troubleshoot issues from unstable configurations whenever you want.
- Profiles: In addition to recovery options, you can also create, save, and restore various profiles for each of your configurations.
- Multiple display support: The cherry on top is that it supports multiple monitor configurations, so you can finely tune every one of your screens.
- GPU compatibility: It works across various graphics cards, including NVIDIA, AMD, and Intel models.
- Fine-grained configuration: You can tweak all kinds of timing parameters for each resolution, including horizontal and vertical pixels, sync width, porch settings, and pixel clock.
- EDID file editing: You can also directly edit the monitor's EDID configuration file to fix detection issues or force specific features. That way, you don't have to deal with .inf files.
- Extension blocks: The addition or modification of CEA-861 extension blocks is also supported for advanced features like audio and 3D video formats.
- No installation required: It is a standalone tool that's portable and easy to use without system installation.
How to use Custom Resolution Utility (CRU)?
Getting started
Follow these steps to adjust your display settings using CRU.exe:
- Launch CRU.exe. You may encounter a User Account Control (UAC) prompt as it requires permission to modify the registry.
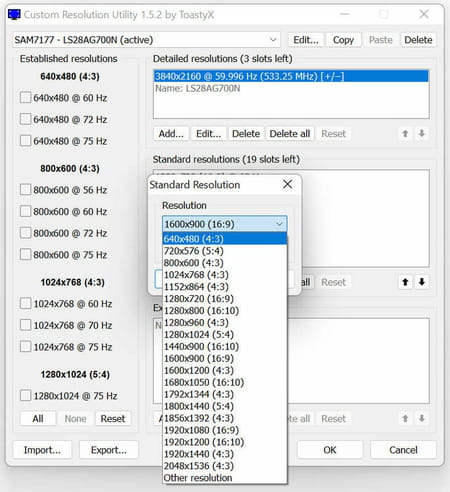
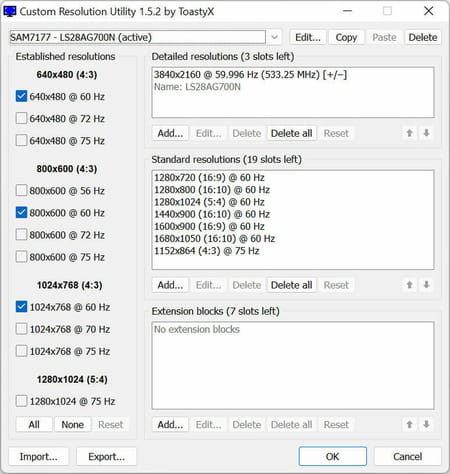
- Select your display from the dropdown menu:
- An "(active)" label indicates the display currently connected and recognized by the graphics driver.
- A "*" symbol signifies that modifications have been made with an override saved in the registry.
- Customize your settings according to your preferences. Refer to the subsequent sections for detailed guidance.
- If you have multiple displays, repeat the customization process (steps 2 and 3) for each.
- Use the "Copy" and "Paste" options to replicate resolutions, extension blocks, and range limits from one display to another. Note that while this does not copy the display's name or serial number, it does duplicate the inclusion of these elements based on the display's unique information. The process is similar when importing unless you select "Import complete EDID."
- Hit "OK" to apply your adjustments.
- Execute restart.exe to reboot your graphics driver. Should the display fail to reappear within 15 seconds, press F8 to enter recovery mode, temporarily removing all EDID overrides without erasing them. Restart the driver to apply any changes. Note that on specific systems, the graphics driver may crash during restart. If the driver becomes disabled after a reboot, rerun restart.exe to reactivate it.
- To adjust the resolution and refresh rate, access the Windows display settings:
- For Windows 10: Right-click on the desktop, select Display settings > Advanced display settings > Display adapter properties and navigate to the Monitor tab.
- For Windows Vista/7/8/8.1: Right-click on the desktop, choose Screen resolution > Advanced settings, and go to the Monitor tab.
To revert a display to its original settings, click the "Delete" button at the top to remove the registry override and reboot your computer. To reset all displays to default, run reset-all.exe and reboot. If needed, this can be performed in safe mode.
Alternative method for Intel GPUs
For older Intel GPUs, an alternate approach involves using the "Export..." option and selecting "EXE file" as the file format to create a standalone EDID override installer. Execute this .exe file and opt for "Install EDID" to apply the EDID override across all compatible displays.
To go further
For additional information, you can consult this very detailed forum post.
Is Custom Resolution Utility (CRU) free?
Yes, Custom Resolution Utility is totally free to use.
Is Custom Resolution Utility (CRU) safe?
Indeed, Custom Resolution Utility is considered safe to use, and nothing has been reported so far.
- Cru download
- Cru monitor
- Custom resolution utility download
- Ps3 resolution not supported > Guide
- PS3 not supported [solved] > PS3 & PS4 Forum
- Timer resolution download > Download - Gaming tools
- Keyboard test utility > Download - Mouse and keyboard
- Dshidmini control utility > Download - Gaming tools