AutoCAD guide for beginners: tips and trics

AutoCAD is the most popular and useful program among architects, landscape designers and engineers. With it, you can create plans, different graphs and schemes. The software is relatively expensive, so if you only need to make several edits to your drawing, you can use the free AutoCAD Web app. In this article, we will guide you on how to edit and create drawings using AutoCAD Web app.
To start using the AutoCAD Web App you need to register on Autodesk and create a profile. Go to AutoCAD website and click on Create a free account or Sign In if you already have one. After this, you will be redirected to the AutoCAD Web Editor where you can start creating or editing your images.
How to upload your image or create a new one?
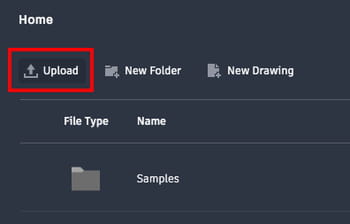
To upload an image for editing in AutoCAD, click on Upload in the main page and select a picture you’d like to edit:
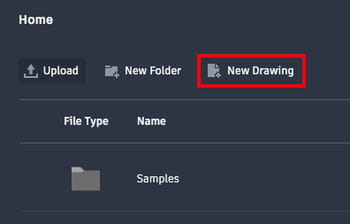
To create a new drawing on AutoCAD, click on New Drawing:
How to use layers on your drawing?
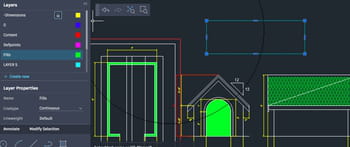
Layers help you to save different plan options. For example, if you are working on a house plan, one of the layers can be a geometric plan, plumbing, electricity, furniture etc. Using layers, everyone who works on a project, can work in their own layer without editing other layers but still using them.
To add a layer in AutoCAD Web, click on Layers in the left-side menu and choose Create New:
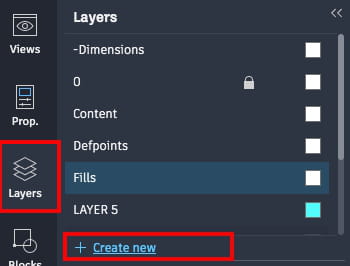
You can give your layer a colour to easily distinguish it from others by clicking on the white box next to the layer of your choice and selecting a colour:
If you want to hide a layer, you can simply click on the little light icon next to it:
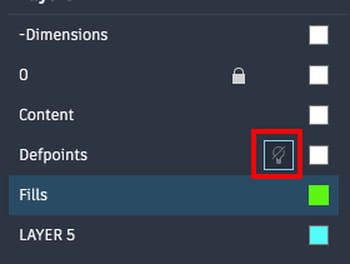
On your drawing, you will see the layers highlighted with different colours, so you can understand which layer you are currently using and which ones are switched off.
How to use properties?
Properties are each layer’s data, which can also be useful for your drawing. Here you can see measurements, change colours and line type.
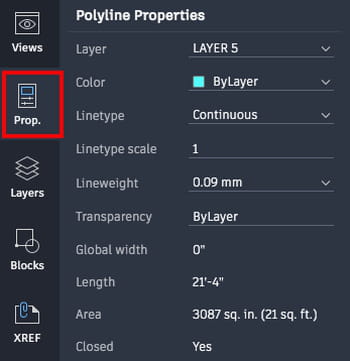
How to use drawing tools?
To create a drawing or add new forms, you can use different tools located in the bottom-left side of the screen. Click on Draw and use various forms and tools, such as rectangle, arc, circle, line, pline or hatch:

How to add footnotes to your plan?
To add footnotes on your drawing, use the Annotate panel and use different tools of this section. You can click on Measure or Dimensions to measure the lines and figures and leave a note or add a text by clicking on the A icon. Moreover, you can add a note with an arrow by clicking on the last symbol with a circle and an arrow:

How to modify drawings?
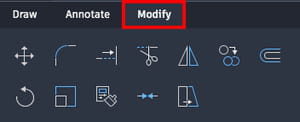
To modify your drawings, go to Modify Selection and use the tools located below it.
You can move different parts of your drawing around by clicking on the Move tool, duplicate forms by clicking on the Mirror tool, cut, extend, stretch, rotate and other instruments.
How to save your drawing?
To save your drawing, click on the little arrow icon next to Save in the top right corner, select Save As and choose the folder where you’d like to keep it.

How to download your drawing?
To download a drawing from AutoCAD Web to your computer, click on AutoDesk logo in the upper-left corner of the screen. Go to the folder, where you saved it and click on the Download in the top menu:
How to save a file as PDF?
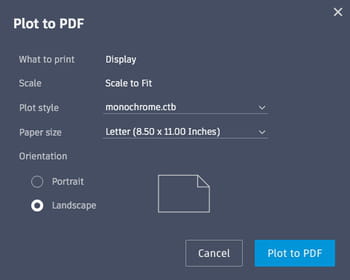
Your file will be saved in .dwg format. If you’d like to save your file in PDF format, click on the print icon (Plot to PDF) in the top-right corner and choose the Plot style, Paper size or page orientation and click Plot to PDF.


