What does mousocoreworker.exe do: how to fix, disable (2023)

During a Windows update, your computer just started to slow down and you find that the process is consuming a lot of CPU and RAM? Here in a couple of minutes you will learn about what kind of file it is and how to make it so that it does not overload your computer.
What Is MoUSO Core Worker Process?
Windows contains many routines and files whose purpose we may not even know, but which are very important because they provide the work of all parts of this advanced operating system. One such file in Windows 10 and Windows 1 is musocoreworker.exe and it stands for Microsoft Update Session Orchestrator. This file is part of the UUP platform (Unified Update Platform), which is responsible for the stable implementation of periodic updates of the operating system.

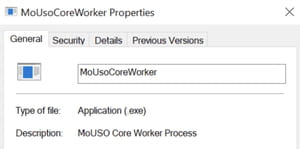
Important tip! Viruses and trojans often mimic legitimate Microsoft file names, so it's a good idea to make sure that a running file under the name is exactly the same file, and does not resemble it in name. Real Windows executables are signed by Microsoft. To verify the authenticity of the file, in the Task Manager, right-click on the MoUSO file and select Properties, and then in the General tab of the Properties window, copy the path next to Location and paste the copied path into the address bar of File Explorer. Also, to be sure, you can scan this file as you would any .exe file with the built-in Microsoft Defender/Windows Security scanning service. It's very simple. Locate the file and right-click it > Scan with Microsoft Defender.
Locate the process executable, right-click on it and select Properties and open the Details tab. There should be an inscription: "Microsoft Corporation. All rights reserved".
How to Fix MoUSOCoreWorker.exe
As we already mentioned, usually musocoreworker.exe is activated when there is a check for updates. But sometimes it may happen that after completing the check and installation of updates, the update does not start and the file continues to work. This leads to high RAM and disk usage, which naturally results in a significant slowdown in your PC.
Restart Windows Update
You can try restarting the update, and perhaps the glitch will disappear. You can restart the Windows Update service by writing Services in the Windows search bar > Windows Update. Right click on it > Restart.
It can also help further restarting the Update Orchestrator Service. You can find this service in the Services app.
Run Windows Update Troubleshooter
But what if that doesn't help and the file continues to work stubbornly? Find and fix problems in updating the OS will help you the built-in Troubleshooter that Windows 11 is equipped with. To launch it, click Start and in the search bar write Settings and confirm this with the Enter key. In the list that appears, find the item Troubleshooting, and click on it. Here search for a troubleshooter labeled Windows Update.
In the older versions of Windows, right-click the Windows Start button and select Settings. In the Update & Security section, find the Troubleshooting tab and right click on Advanced Troubleshooters. Locate the Get Up and Running section and click on Windows Update > Run the troubleshooter.
Disable the Update Orchestrator Service
If all else fails and the glitch continues, you can completely cancel the update service and thus stop the MoUSO process. To do this, in the Services application, right-click on the Update Orchestrator option and select Properties > General > Startup Type > Disabled > Apply > OK.

