
Add a background image or watermark to a Word document


The default blank background of a Word document can look a little drab to some. You may want to jazz it up by inserting a background image or a printed watermark.
How to insert a background image to a Word document?
- Select the Format option from the Menu bar of your Word document.
- Go Background > Fill Effect > Picture > Select Picture.
- Browse for the picture that you want to insert. When done, click OK:

How to insert a watermark to a Word document?
To insert a watermark in a Word document, follow these steps:
- Go to the Design tab and select Watermark.
- Browse for the watermark that you want to insert and select one of the built-in watermarks to insert it into your document.
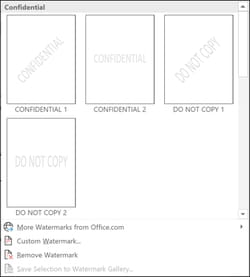
- When you are done, confirm the changes by selecting Apply, then OK.
How to insert a custom watermark?
- If you'd like to add not a built-in watermark, but a custom one, simply go to Design > Watermark > Custom Watermark.
- Next, select Picture watermark or Text watermark and either select a background picture that will be a watermark on your document, or type the text you'd like to appear in the background.
- Finally, click OK to save the changes.
Do you need more help with Word? Check out our forum!
Subject
Replies