How to adjust Snapchat video quality settings (2023)

Does your Snapchat app have poor video quality? There is a fix for that. This quick tip will teach you how to change the video quality on Snapchat, helping you watch high-quality videos on the application. Read on!
How to change the Snapchat video quality settings?
Snapchat automatically adjusts video quality based on various factors such as your device's capabilities, network conditions, and the specific features being used.
- Open the Snapchat app and tap on the Settings menu (represented by a gear icon).
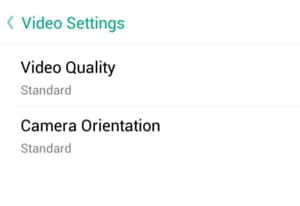
- Scroll down to the Advanced section and select Video Settings:

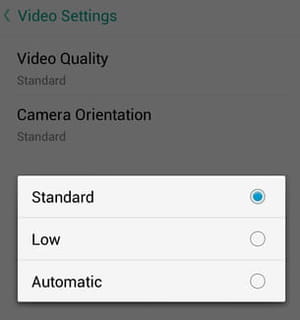
- Next, tap on Video Quality and make your selection:

- You can choose from Standard, Low, or Automatic video quality.
- If it didn't help, clear Snapchat's cache files, check your internet connection, and restart the app.
Don't forget to update the app (as well as your device's system) from time to time so it offers the best options.
How to improve Snapchat image quality?
- Use a high-quality camera: Ensure that you are using a device with a good-quality camera. The quality of the camera on your device directly impacts the quality of the photos and videos you capture on Snapchat.
- Good lighting: Well-lit environments generally result in better image and video quality. Try to capture videos in well-lit conditions for clearer and more vibrant content.
- Stable Internet connection: A stable and fast internet connection can contribute to better video quality. Make sure you have a strong Wi-Fi or data connection when recording or uploading videos.
- Avoid using zoom: Snapchat's zoom feature may reduce the quality of your videos. If possible, avoid using the zoom function within the Snapchat app.
- Update Snapchat: Ensure that you are using the latest version of the Snapchat app. Developers often release updates that may include improvements to the app's overall performance and image/video processing.
You need more help with Snapchat? Check our forum!

