
Laptop overheating: how to fix?

Overheating in a laptop is a serious problem and should not be taken lightly. In fact, the cooling system of the laptop should be an important consideration for you before buying. Black screen displays, system crashes, and sudden restarts are some of the symptoms of this problem. This tutorial will walk you through other ways that you may fix an overheating problem in your laptop.
N.B. The suggested manipulations below are not to be taken lightly. CCM is in no way responsible for any mishandling or damage that may result from these manipulations.
Why do laptops overheat?
A laptop has a less efficient cooling system than that a desktop PC due to its size. This is also why laptops tend to make more noise when cooling.
Although the components for a laptop have much lower consumption than the components for a desktop PC, this does not in any way dissipate the heat generated while they are in use. The cooling system must always be taken into consideration before buying a laptop, especially if it boasts high-end performance.
How to check if your laptop is overheating?
To check if your laptop is overheating, you should check the processor, graphic cards, and hard drive. There are several free programs, like CPUID HWMonitor that help you to control these temperatures.
Signs your laptop is overheating?
There are many ways to see if your laptop is overheating. If you notice a black screen repeatedly appearing or that you have to reboot your computer often, your laptop may be suffering from overheating. Other signs include crashing or automatic restarting while loading elements or applications.
Hardware add-ons and quick fixes to cool your laptop
Here are a few hardware add-ons that you may consider to help you to cool your system.
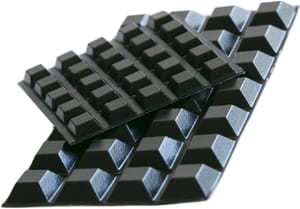
Self-adhesive rubber feet
One of the cheaper solutions, you can get a pack of self-adhesive rubber feet on Amazon for around $10. Choose a height of about half an inch to one inch. The result will be better heat dissipation between your CPU and the surface on which it is placed.
To install them, fix two to four feet — depending on the cooling system of your PC — to the bottom of the processor. For example, two in the back may be enough, if the cooling vents are not in the front.
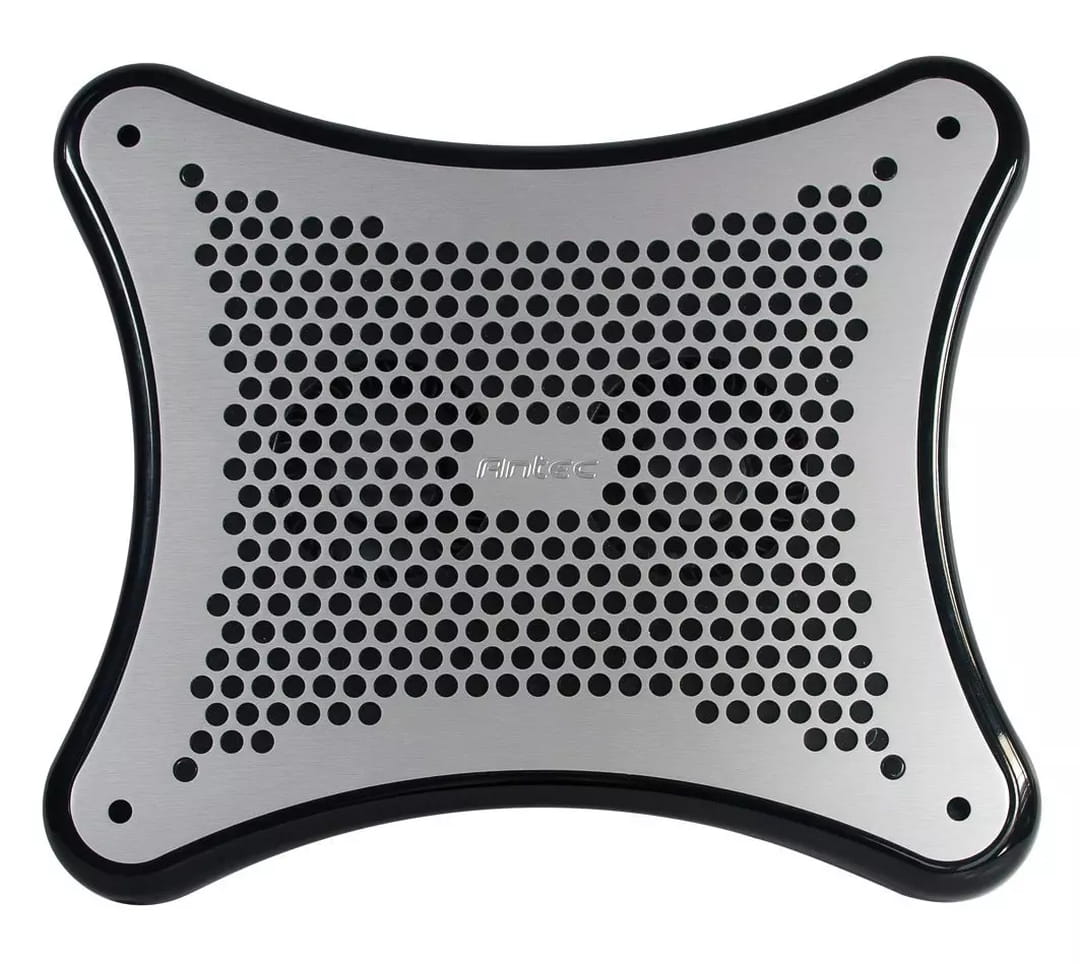
Notebook cooler
Notebook coolers are a bit more expensive but they are much more effective. However, buying a notebook cooler must be done intelligently, and it is best if the fans are placed at the level of the PC's cooling vents. You should also consider noise level when selecting your hardware.
N.B. Avoid gadgets like mini coolers. Although they are cheap, their effectiveness is questionable. If your PC lacks USB ports, also try to buy a notebook cooler with a built-in USB hub.
Improving ventilation
This method is less effective than hardware add-ons, but it is better than nothing. To improve ventilation, remove components that are not vital to the system, like the battery and cards. You can also open the CD/DVD drive.
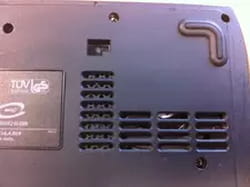
Clean your laptop
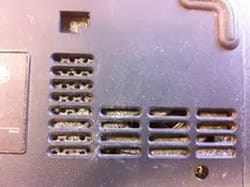
If your PC gets too hot and turns off while running games and heavy applications, it may be time to clean it up. Dust is the worst enemy of your laptop, as it will stay inside the cooling system, reducing heat dissipation.
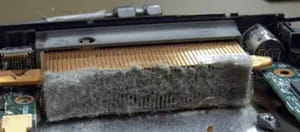
Here is an example of what a CPU cooling system looks like when crowded with dust:
To clean it out, begin by turning off your computer and waiting for it to cool down. This step is crucial and, if you ignore it, you risk damaging fragile hardware components.
Next, you can move onto cleaning it. The best option is to use a vacuum with a rubber tip whose speed and power you can regulate to make sure that it is effective without being damaging. You should use the lowest power setting.
If you do not have this sort of vacuum at your disposal, use a compressed air can to blow out any dust housed in any crevices in your laptop's cooling system.
Once cleaned, the vents should look like this:
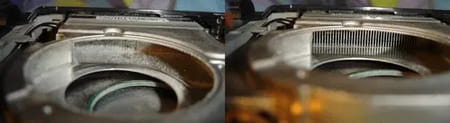
Please note that you must also go inside of the vents to get a really good clean. Since they are so difficult to access, they can accumulate the most dust. Here is an example of a dirty cooling fan:
And here is an example of a clean and dust-free fan:
Changing your laptop's thermally conductive heat paste
You may consider swapping out the thermally conductive heat paste, which acts as a gap filler between metal and more fragile, plastic parts on your laptop.
You can get a good quality paste on Amazon for as low as $7.

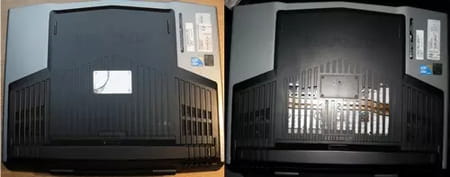
Modifying your casing
This tip is reserved for those who are experienced in taking apart and building computers and are not afraid of nullifying their laptop's warranty. It also helps for you to have a spare casing available in the event that you current one gets damaged in the process.
In order to know where to drill holes or slits to increase airflow, you have to first understand how your laptop's cooling system works. This varies between laptops. Here is an example of the system on an Alienware M15x, before and after having slits drilled:
How to undervolt your laptop?
Undervolting your laptop entails restricting the power that your CPU commands, which in turn, reduces the amount of heat that it produces while executing these commands. In this process, you will gradually reduce the amount of voltage used while trying to maintain the current performance of your laptop. That way, it will use less power, thereby causing less heat, while still functioning the same.
To begin the undervolting process, back up your PC so that you do not lose any of your data in case anything goes wrong during the process. Now, download and install the Intel Extreme Tuning Utility.
Open the software. Start by running a Benchmark test to see where your device stands right now before you make any changes. You may also want to perform a few stress tests to see how your device behaves under normal conditions. Select CPU Stress Test and select the amount of time you want the test to run for. (It is recommended that you choose a time frame of at least 30 minutes for best results.) This will be useful as a refernce to which you can compare your results.
Now, you can begin undervolting your system. Under the Advanced Tuning tab, go to Core. Look at the Core Voltage Offset values. If they are in blue, then your values art at default. Any change that you make to your settings will cause these values to be marked in yellow.
Click the drop-down menu next to Core Voltage Offset labelled 0.000 V. Here, there will be a group of voltages at 0.005 v intervals. Scroll up until you see negative figures, as you are attempting an undervolt and not an overvolt. The negative figure represents the fact that you will be sending fewer volts to the processor, whereas the positive figures mean that you will be sending more. To avoid the risk of damage to your processor, only choose negative numbers.
Now, you will need to select negative figures in trial and error. Start at -0.010 V, and click Apply. Move down in the figures gradually (by about 0.005 each time) so as not to shock your system.
After each voltage modification, go to Stress Test and launch a 30-minute stress test to see if the behavior is in line with your original benchmark tests. The best sign of a severely undervolted system in stress will be if you receive a blue screen of death. If your system crashes, simply restart it and set it to the last successful voltage.
The purpose here is to maintain original performance while consuming less voltage, so as soon as performance drops, we know we’ve gone too far and we need to bring it back.
Once you find the voltage that does not make your CPU crash after 30 minutes of stress testing, you should carry out one final stress test. If it is successful, then you may leave the voltage as it is. If not, you should revert to a higher number (closer to zero) and try the test again.
Other tips for limiting overheating
You should never use your laptop on surfaces that are not flat, as this limits air circulation. This includes on your lap, on blankets, or on a mattress.
You should also avoid using your laptop directly in the sun, especially during the summer months. If you can, avoid bringing your laptop to places like sandy beaches or the park, where there are high quantities of pollen, because these elements can enter and clog your computer's cooling system.
Finally, avoid using your laptop while it is charging or with "optimal performance" settings enabled when unnecessary. Activities like web browsing, image viewing, or using a word processor do not need this much power and can easily cause your laptop to overheat.