Automatically save screenshots: to OneDrive

This tutorial explains how to automatically save a copy of the screenshots you take to your OneDrive cloud. Prior to this operation, you will need to install and configure the OneDrive client on your PC (a Microsoft account is required).
To automatically save screenshots to OneDrive:
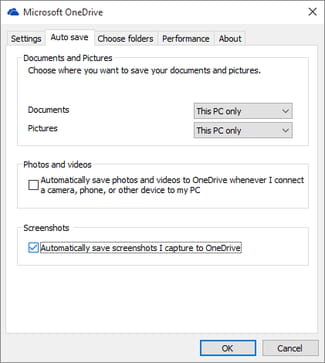
Right-click on the OneDrive taskbar icon > Settings. Go to the Auto save tab > Screenshots. Tick the button that reads Automatically save screenshots I capture to OneDrive, and click on OK:

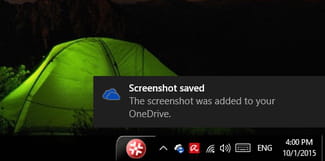
Moving forward, each time you take a screenshot using the PrintScreen key (copied to clipboard), a copy of the screenshot will also be uploaded to OneDrive. A small notification will be displayed at the bottom right corner of your screen:

To view your screenshots, simply connect to your OneDrive account and navigate to Pictures > Screenshot folder to view your files.
