
Permanently disable Windows Defender in Windows 10


If you find that Windows Defender is preventing you from running/installing programs or downloading files, you can remove it manually. In this article we will show you how to turn off Windows Defender on Windows 10.
Why should you disable Windows Defender?
Windows 10 includes Windows Defender, a built-in antivirus software that's a first line of defense against malware infections. It scans your PC in real-time for malicious software, and it is automatically disabled once you have installed an antivirus software on your system. Are you interested in learning how to disable Windows Defender? There are two ways do do this, one will disable Windows Defender Windows 10 temporarily and the other will disable
How to temporarily disable Windows Defender?
- To temporarily disable Windows Defender, head to Start > Settings > Update & Security > Windows Defender. Toggle the switch below Real-time protection to the Off position.
How to permanently disable Windows Defender?
- Right-click on the Start menu > Run. Type: regedit
- Then, open the Registry editor by clicking OK.
- Navigate to the following key: HKEY_LOCAL_MACHINE \ SOFTWARE \ Policies \ Microsoft \ Windows Defender.
- Click Edit > New > Dword (32-bit) value. Rename the new item as DisableAntiSpyware and set its value to 1 to disable Windows Defender on your system:
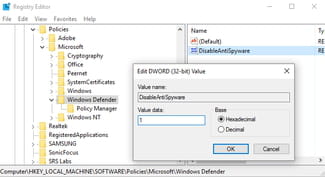
- Save your settings, and close the Registry editor.
- Should you ever try to activate Windows Defender on your system, the following message will be displayed:
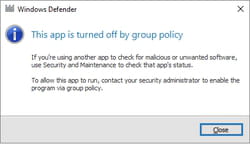
- You can enable Windows Defender back by setting the value of DisableAntiSpyware to 0.
Need more help with Windows 10? Check out our forum!
Subject
Replies