How to factory reset Acer desktop: Windows 8, Windows 7

Read on to find out how to reset your Acer laptop to factory settings.
What to do before your start?
Always remember to do a backup of your data because you may lose it in the process. Speaking of the process, it may take quite a lot of time, so it's better to keep your PC plug-in to charge.
How to restore Acer computer to factory settings: Windows 7?
To do so, you can use the Acer eRecovery Management.
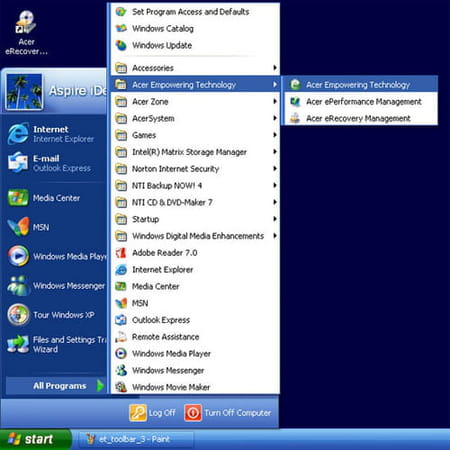
- Click Start > All programs. Then, run Acer Empowering Technology, followed by Acer eRecovery Management:
- Click the Acer eRecovery Management icon in the Acer bar displaying on your desktop:

- In the main window, the Acer eRecovery Management program will appear:
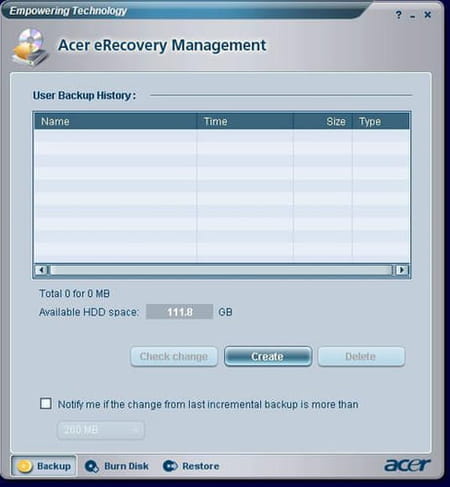
N.B. During the launch, Acer eRecovery Management will ask you to create a password for saving files. Just follow the instructions to continue.
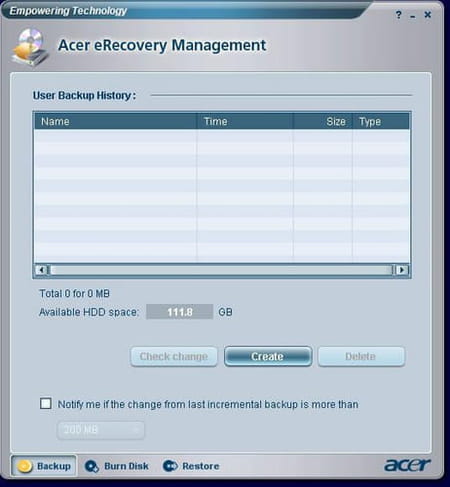
- At this point, it is recommended that you create a complete backup of your system. Click Backup button > Create:
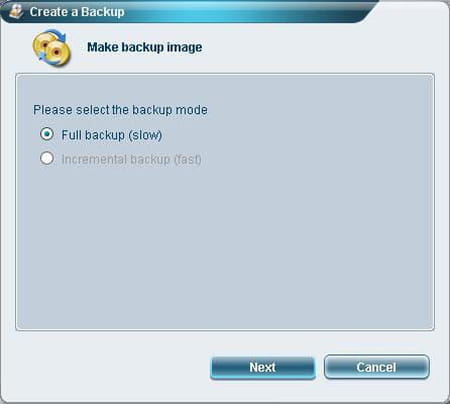
- Select Full Backup > Next:
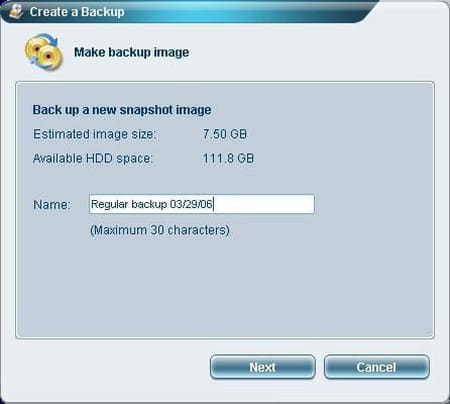
- Choose a description for the backup image, then click Next:
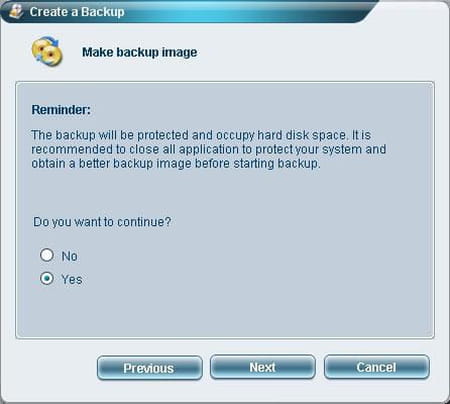
- Then, a window will appear asking if you'd like to close all applications. Select Yes > Next:
N.B. You may also elect to create regular incremental backups instead of one large backup. To do this, click Backup > Create > Incremental Backup > Next. You may delete any backups you've created at any time to free up space.
How to restore Acer computer to factory settings: Windows 8?
Repair Disk:
- First, connect the repair disk.
- From there, boot your computer.
- An installation screen will appear. Click Next.
- Next, select Repair this PC.
- Now, click Troubleshoot.
- After that, click Reset your PC.
- Choose Remove everything.
- Click Restart.
Alt + F10 keys:
- Boot your computer.
- Press Alt + F10 at the same time when the Acer logo appears.
- Select Troubleshoot.
- Click Reset your PC.
- From there, select Remove everything.
- Select Restart.
How to restore Acer computer to factory settings: Windows 10?
You can try the solution for Windows 8 or restore to factory settings with the Acer Care Center:
- Open the Search bar and type Type Acer Care Center.
- Select Acer Recovery Management.
- Click on Get started in order to reset your computer.
- Select Remove everything.
- Select Just remove my files.
- Click Reset.
How to restore Acer computer to factory settings without a password?
You can try all the Windows 8 and Windows 10 solutions quoted above to factory reset your Acer computer without a password.
How to restore Acer computer to factory settings using the Burn Disk option?
Click Burn Disk, and select an option in the window that opens:
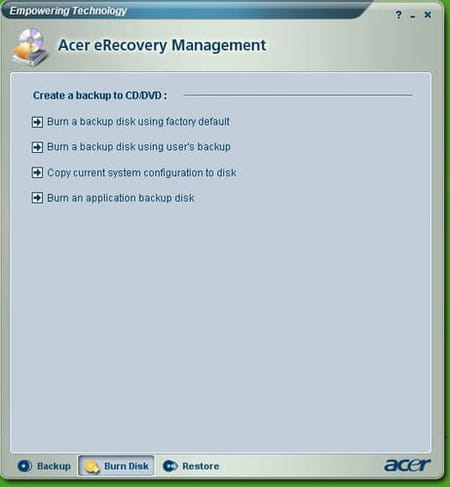
Burn a backup disc with the factory default settings creates a backup disk containing the factory default settings.
Burn a backup disc with the parameters of user copies the backup image of the user on an optical disc. You can restore the system to the desired backup using this disk.
Copy the current system configuration to disc copies the current system to the optical disc. This option creates a temporary backup of the current system without replacing the previous full backup.
Burn a disc backup software backs up all of the applications and drivers to the optical disc.
Restore the system allows you to restore the system using images of factory default settings, images of backups, backups of system, and applications copied to CDs/DVDs.
Restore system to factory default settings allows you to restore the computer to its original state. All previously installed programs and data stored will be lost. When this option is selected, the computer will restart and restore the system from the image on the hidden partition on the disc.
Restore system from backup user allows you to restore the system using the most recent backup image. When this option is selected, the information in the backup image will appear below the option.
Recover the system from CD/DVD allows you to restore the system using the backup image on the optical disc. When this option is selected, the computer restarts from the optical disc. The utility asks you to insert the backup drive if it is not already inserted.
Re-install applications/drivers lets you reinstall a damaged application or device driver. Acer eRecovery Management extracts the data from the hidden hard disk partition. This may take a few minutes and can disable the keyboard and mouse to ensure system stability.
What are some other ways to restore the system?
If the system cannot boot, you can restore it from the WinPE environment. The system starts from the hidden partition on the hard drive.
To begin the restoration, press Alt + F10 (PC Tower) or F10 (laptop) to boot the PC when the Acer logo appears. This will start the system from the hidden partition on the hard drive and will give you access to its main page. The restoration will be on partition C:.
N.B. Partition D: (ACERDATA) will not be formatted, and therefore, documents will not be deleted. But it is always prudent to think about making a backup of your most important documents.
You must enter the password to access the main page of the hidden partition. You will be asked to enter the password before the System Restore starts. If you enter the wrong password three times, the computer will restart into the operating system.
The main page of the hidden partition provides several options to restore the system.
Restore the system to factory default settings will restore the system from the image of the factory default settings on the hidden partition on the hard drive. When prompted, confirm the system restore. A message will warn you that you will lose all data on the disc. The utility then restores the system to its original state.
Restore the system from backup user restores the system from the image of the user on the second partition on the hard disk. When prompted, confirm the system restore. A message will warn you that you will lose all data on the partition. The utility then restores the system to safeguard the most recent user.
Restore the system from the CD/DVD will restore the system from the backup image on CD / DVD. When this option is selected, insert the first disc of the backup in the optical drive. Confirm System Restore when prompted. A message will warn you that you will lose all data on the partition. Insert the other disks when prompted.

