Multi-touch gestures on Windows 10: enable and disable

Windows 10 introduces new multi-touch gestures to facilitate interaction with your desktop and apps. In this article, we will walk you through the steps on how to enable or disable this feature and make the most out of it.
What are the common touchpad gestures on Windows 10?
We have compiled a roundup of the common touchpad gestures available in Windows 10:
- Select an item (click): Tap on the touchpad. - Right-click: Use a 2-finger tap or press in the bottom-right corner. - Scroll: Slide horizontally or vertically with two fingers. - Zoom in/out: Make a 2-finger pinch or stretch. - Open Task View: Place three fingers on the touchpad and swipe upwards. - Show the desktop: Place three fingers on the touchpad and swipe downwards. - Switch between open windows: Place three fingers on the touchpad and swipe right or left. - Invoke Cortana or Action Center: 3-finger tap.
How to tell if your PC has a precision touchpad?
Some multi-touch gestures are only available with precision touchpad (a type of touchpad optimized for Windows 8, 8.1, and 10). Click on Start > Settings > Devices > Mouse & touchpad. If your laptop is equipped with a precision touchpad, a message that reads "Your PC has a precision touchpad" will be displayed at the top of the Touchpad settings page.
How to enable or disable touch gestures?
If you are having a hard time using the new gestures, click on the drop-down menu below To prevent the cursor from accidentally moving while you type, turn off taps or change the delay before taps works and adjust the touchpad delay.
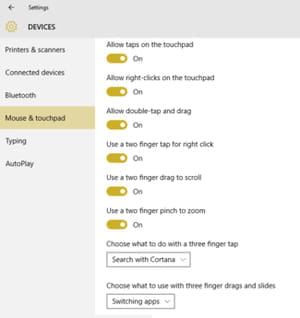
Windows 10 also allows you to disable touch gestures. Scroll to the bottom of the Touchpad settings page and then turn off the touch gestures you don't want to use:

You can also set the default action assigned to the 3-finger tap. Click on the drop-down menu below Choose what to do with 3 fingers, tap and select one of the available options: Nothing, Search with Cortana, or Open Action Center.

