
How to change account name in Windows 8.1


This quick tip will teach you how to modify your account settings on your Windows 8.1 account while using Microsoft Live. This will permit you to change any of your basic information, including your account name.
To change the name of a Microsoft account:
-
Sign into Windows 8.1 using the account that you would like to modify.
- From the Home screen, click on Windows + C to display the Charms bar.
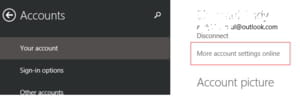
- You can navigate to your account settings by going to Settings > Change PC settings > Accounts > Your Account.
- Click on More account settings online:
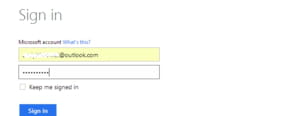
- Sign-in with your Microsoft account:
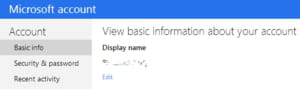
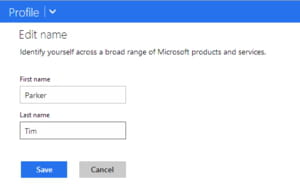
- In the Display name section, click on the Edit button:
- Change your account name, click on Save, and close your browser:
- If you look back at the Start screen, you will notice that the account name is still the same. You can update it by pressing Windows + C to display the Charms bar.
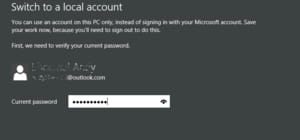
- Next, go to Settings > Change PC settings > Accounts > Your Account. Click on Disconnect to switch to a local account.
N.B. There is no need to define a password here, as you will only use this local account once:
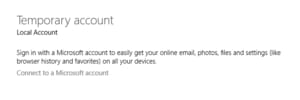
- Once done, connect to Windows 8.1 with your temporary local account. You can do this by again navigating to the Charms bar from your Home screen.
- Go to Settings > Change PC settings > Accounts > Your Account.
- Click on Connect to a Microsoft account and follow the onscreen procedure:
- Your account name will be updated once the procedure is complete.
Any more Windows questions? Check out our forum!
Subject
Replies