How to remove guest mode in Chrome: Windows, Mac, Chromebook

In this guide, we will show you how to prevent unauthorized people from using Google Chrome on your PC. We will show you how to use an extension to password protect Chrome, how to remove guest mode and prevent guest browsing and also how to set up multiple Google Chrome profiles.
How to restrict access to Google Chrome?
With an extension
It depends on what you want to do, if you want to restrict anyone who has access to your PC from using Google Chrome, then you can add a password to Google Chrome with an extension, such as the LockPW extension or the Chrome Lock extension. All you need to do is install either extension onto your Chrome browser and then assign a password. These extensions allow users to set up a password for Chrome to prevent unwanted access. You will prompted to enter a password for Chrome whenever you startup. However, if you leave your Chrome browser open, someone will still be able to access it. If you want to restrict all unwanted access to your PC then it may be simpler just requesting a password every time that you open your laptop.
Set up Google Profiles
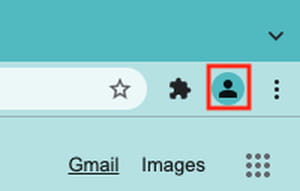
If there are multiple users that use your computer, then you can create multiple profiles, each with their own account on the PC. If you prefer to only have one profile on your PC, you can instead add multiple profiles to your Chrome browser. On Google in the top right hand of the screen, select the profile icon and a drop down will appear.

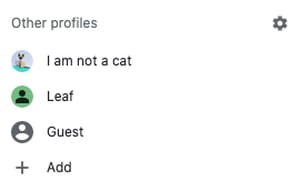
You can scroll through the other profiles associated with your current device and if you want, add a new person or profile at the bottom. Each user can have their own profile when they connect to Google Chrome and will have their own browsing history associated with that account.

How to remove guest mode in Chrome on Windows?
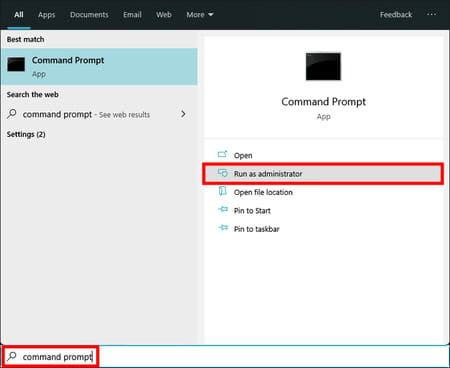
If you want to completely disable guest browsing then there is a solution, although it requires you to go into the Command Prompt in Windows, or the Terminal on Mac. For a Windows PC you will want to start in Windows Search. Look for command prompt in the search bar and then choose to run as administrator.

Then enter the following into the command prompt and click enter.
REG ADD HKLM\SOFTWARE\Policies\Google\Chrome /v BrowserGuestModeEnabled /t REG_DWORD /d 0

Now restart your computer and close any existing Google Chrome windows and tabs that you had open. When you reopen Chrome and click on profile, the option to browse as a guest will have been removed. To undo the above process, all you need to do is go back into the command prompt and enter the following and then restart your PC and Chrome again and it should be back to normal:
REG DELETE HKLM\SOFTWARE\Policies\Google\Chrome /v BrowserGuestModeEnabled /f
How to disable guest browsing in Chrome on Mac?
Removing the option to browse on Google Chrome with the guest mode on a Mac requires you to go into Terminal and type the following:
defaults write com.google.Chrome BrowserGuestModeEnabled -bool false

Once you have pressed enter, close any open Chrome Windows or Tabs and then restart your Mac. Once your computer has restarted open Chrome. Now when you click on the profiles, you should only see your main profile, and any other profiles, but there will no longer be the guest option in the bottom left. If you want to revert to how it was before, all you need to do is go back into Terminal and enter the following:
defaults write com.google.Chrome BrowserGuestModeEnabled -bool true
How to use guest mode on Chromebook?
You can use Chromebook in guest mode without signing in if you borrowed someone else's Chromebook or want to borrow yours.
- If you're signed in to the Chromebook, sign out and click Browse as Guest at the bottom of the screen.
- To exit the guest mode on Chromebook, click the time at the bottom right and select Exit guest.
- If you want to enable/disable guest browsing on your Chromebook, click on Time at the bottom right and select Settings > Security and Privacy > Manage other people. Finally, enable or disable Guest browsing.

